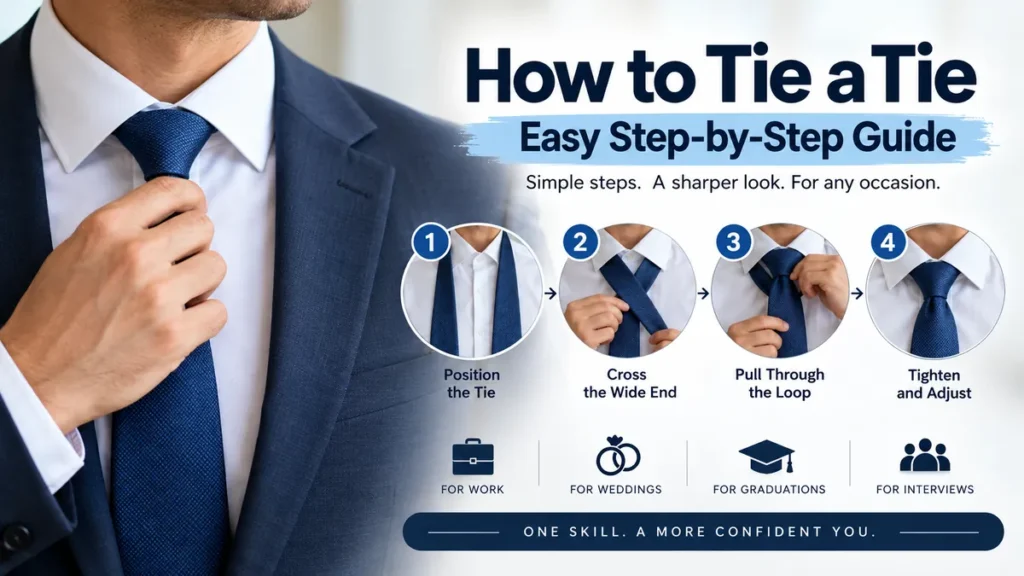
A tie can look complicated when you are holding two loose ends in front of a mirror. Once you understand the basic movements, though, tying one becomes surprisingly simple.
If you are learning how to tie a tie for the first time, start with the Four-in-Hand knot. It requires only a few movements, works with most neckties and shirt collars, and is easy to adjust. After mastering it, you can move to the more symmetrical Half Windsor or the larger Full Windsor.
Quick answer: Drape the tie around your neck with the wide end longer than the narrow end. Cross the wide end over and behind the narrow end, bring it across the front, pull it upward through the neck loop, then down through the front loop. Tighten gently and slide the knot toward your collar.
How to Tie a Tie Step by Step
For most beginners, the Four-in-Hand knot is the easiest place to start. It creates a relatively slim, slightly asymmetrical knot and requires fewer movements than the Half Windsor or Full Windsor.
Before starting, button your shirt to the top and raise the collar. Place the tie around your neck with its front side facing outward.
These instructions assume that the wide end begins on your right. If you prefer working from the opposite side, simply mirror the directions.
Step 1: Position the Tie
Place the narrow end on your left and the wide end on your right.
The wide end should hang considerably lower than the narrow end. Exactly where you start depends on your height, torso length, tie length, fabric thickness, and the knot you are tying.
A useful rule is to remember your successful starting position rather than relying on one measurement every time.
Step 2: Cross the Wide End Over
Take the wide end and cross it over the narrow end toward your left.
You should now have an X shape just below your neck.
Hold the crossing point gently with one hand so the tie does not shift while you make the next movements.
Step 3: Bring the Wide End Behind
Pass the wide end underneath the narrow end and bring it toward your right.
At this stage, the back or seam side of the wide end will briefly face outward.
Keep the narrow end relatively still. For the Four-in-Hand, nearly all the movement comes from the wide end.
Step 4: Wrap Across the Front
Bring the wide end horizontally across the front of the narrow end from right to left.
This creates the visible front portion of your knot.
Do not pull everything completely tight yet. Leaving a little space makes the final threading step much easier.
Step 5: Bring the Wide End Through the Neck Loop
Take the wide end upward from underneath and pass it through the opening between your tie and your neck.
Pull enough of the wide end through to remove excess slack, but continue holding the front loop open with a finger.
Step 6: Pass It Through the Front Loop
Bring the wide end downward through the loop you created across the front of the knot.
Pull it through slowly.
You should now see the basic Four-in-Hand shape forming.
Step 7: Tighten and Adjust
Hold the narrow end with one hand while gently sliding the knot upward with the other.
Stop when the knot rests comfortably against your collar.
Straighten the tie and lower your shirt collar.
That is the complete Four-in-Hand method. Ties.com describes the same basic sequence—over, underneath, across the front, through the neck loop and down through the newly created front loop—as its beginner-friendly method.
Quick Takeaway: If you only learn one necktie knot, the Four-in-Hand is a practical choice. It is quick, relatively small, easy to untie, and suitable for a wide range of everyday situations.
How Long Should a Tie Be?
Knowing how to tie a tie is only part of getting the finished look right. Length matters just as much as the knot.
When properly adjusted, the tip of the wide blade should generally finish around your waistband or belt line. Harvie & Hudson likewise recommends having the tip rest at the belt line.
If the tie finishes far above your waistband, it looks too short. If a large portion hangs below your belt, it is too long.
What If Your Tie Is Too Short?
Untie it and start again with more length on the wide end.
Your starting position controls much of the final length. Moving the wide end slightly lower before tying gives you more working length.
The type of knot also matters. A Full Windsor uses more fabric than a Four-in-Hand, so the same starting position will not necessarily work for both knots.
What If Your Tie Is Too Long?
Start again with the wide end positioned slightly higher.
You can also consider a knot that consumes more fabric, particularly if you are tall enough for the knot and collar proportions to remain balanced.
Avoid repeatedly tucking a badly oversized wide blade into your trousers. Retie it instead.
Which Tie Knot Should You Choose?
There is no single knot that is best for every necktie, shirt collar, fabric, face shape, and occasion.
For most people, three knots cover nearly everything: the Four-in-Hand, Half Windsor, and Full Windsor. The Pratt knot is another useful option when you want a neat, medium-sized alternative.
| Tie Knot | Shape | Size | Difficulty | Works Well With |
|---|---|---|---|---|
| Four-in-Hand | Slightly asymmetrical | Small/slim | Easy | Everyday wear, narrower collars |
| Half Windsor | Symmetrical, triangular | Medium | Easy–moderate | Business, weddings, most dress shirts |
| Full Windsor | Symmetrical, triangular | Large | Moderate | Spread collars, formal outfits |
| Pratt/Shelby | Neat, fairly symmetrical | Medium | Moderate | Business and versatile formal wear |
The fabric matters too. A thick wool or knitted tie naturally produces more bulk, so a compact knot often works better. A thinner silk tie gives you more freedom to use a larger knot.
How to Tie a Half Windsor Knot
Once the Four-in-Hand feels comfortable, the Half Windsor knot is a useful next step.
The Half Windsor creates a more balanced and symmetrical triangular shape while remaining smaller than the Full Windsor. That combination makes it especially versatile for business attire, weddings, interviews, graduations, and other dressier situations.
Half Windsor Steps
- Place the wide end on your right and the narrow end on your left, with the wide end hanging lower.
- Cross the wide end over the narrow end toward the left.
- Pass the wide end underneath the narrow end toward your right.
- Bring the wide end upward toward the neck loop.
- Pass it through the neck opening and bring it down.
- Move the wide end across the front of the knot from right to left.
- Bring the wide end upward through the neck loop from underneath.
- Pass it downward through the front loop you just created.
- Pull gently to tighten.
- Hold the narrow blade while sliding the knot upward toward your collar.
Shape the knot with your fingers as you tighten it rather than pulling hard in one movement.
A good Half Windsor should look relatively symmetrical and fill the collar space without appearing oversized.
When Should You Wear a Half Windsor?
Choose it when the Four-in-Hand feels a little too narrow but the Full Windsor looks too bulky.
It works particularly well when you want a polished knot without making the tie the dominant feature of your outfit.
For many people, that makes the Half Windsor the most versatile middle ground.
How to Tie a Full Windsor Knot
The Full Windsor, also called the Windsor or Double Windsor, creates a wide, structured, symmetrical triangular knot. It is particularly well suited to spread collars and more formal styling.
Because the knot requires additional wrapping, begin with considerably more length on the wide end than you would for a smaller knot.
Full Windsor Steps
- Drape the tie around your neck with the wide end on your right and narrow end on your left.
- Cross the wide end over the narrow end.
- Bring the wide end upward through the neck loop from underneath.
- Pull it down to one side.
- Pass the wide end behind the narrow end toward the opposite side.
- Bring it upward and through the neck loop again, creating the other side of the triangular knot.
- Bring the wide end horizontally across the front.
- Pull the wide end upward through the neck opening from behind.
- Guide it downward through the front loop.
- Tighten gradually while shaping the knot into an even triangle.
- Slide the finished knot upward until it sits neatly against your collar.
The result should be wider and more symmetrical than a Four-in-Hand.
When Does a Full Windsor Work Best?
A Full Windsor is useful when you have a shirt with a wide or spread collar because its larger knot fills the additional space between the collar points.
It can also complement formal suits and occasions where a structured appearance is appropriate.
Be more careful with thick ties. Combining heavy fabric with a Full Windsor can produce an unnecessarily bulky knot.
Four-in-Hand vs. Half Windsor vs. Full Windsor
Choosing between the three becomes much easier when you think about proportion rather than simply formality.
A narrow collar usually looks better with a smaller knot. A wider collar provides room for a larger knot.
Your tie’s thickness changes the equation as well.
Choose Four-in-Hand When:
You want the quickest, simplest method.
It works particularly well for everyday business clothing, slimmer ties, narrow-to-medium collars, and situations where a slightly relaxed asymmetry looks natural.
Choose Half Windsor When:
You want more symmetry without excessive bulk.
It is a strong all-purpose option for job interviews, office wear, weddings, graduations, presentations, and similar occasions.
Choose Full Windsor When:
You want a larger, highly structured knot.
Pair it with an appropriate spread collar and a tie that is not so thick that the finished knot becomes oversized.
Quick Takeaway: Match the knot to the collar and fabric instead of assuming the largest or most complicated knot is automatically the most formal-looking choice.
How to Make a Dimple in a Tie
A tie dimple is the small indentation directly beneath the knot.
It adds shape to the wide blade and helps prevent the tie from looking completely flat. Harvie & Hudson recommends a slight dimple beneath the knot as part of a refined finish.
The easiest time to create one is before fully tightening the knot.
Place your index finger just beneath the center of the knot and gently pinch the edges of the wide blade inward with your thumb and another finger.
While holding that shape, tighten the knot gradually.
Remove your finger and make small adjustments until the indentation sits naturally beneath the center of the knot.
Do not obsess over perfect symmetry. A natural-looking dimple often looks better than one that has been aggressively folded into place.
How Tight Should a Tie Be?
A necktie should sit securely against your collar without making your neck uncomfortable.
The knot should not hang several centimeters below the collar, but you also should not pull it so tightly that the shirt collar bunches, twists, or feels restrictive.
After tightening, check three things:
- The knot sits directly beneath the collar.
- You can move and breathe comfortably.
- The shirt collar remains smooth rather than puckering around the knot.
If you feel pressure against your throat, loosen the knot slightly.
A neat tie should come from correct positioning and shaping—not excessive tension.
Common Tie-Tying Mistakes and How to Fix Them
Most beginner problems are caused by setup rather than the knot itself. Correcting a few details makes learning how to tie a tie much easier.
Starting With the Wrong Length
This is probably the most frustrating mistake.
You complete the knot perfectly, only to discover that the tie finishes halfway up your stomach or far below your belt.
There is no universal starting measurement because body proportions, tie length, fabric, and knot choice vary.
Once you find a starting position that gives you the right final length, remember where the narrow end sits against your torso. That reference point makes future attempts much faster.
Pulling Every Step Too Tight
Beginners often tighten the tie after every movement.
That makes it difficult to pass the wide end through the final front loop.
Keep the knot relatively loose while building it. Tighten and shape it near the end.
Twisting the Wide End
Watch the face of the tie as you wrap it.
If the wide blade twists unexpectedly, the seam or reverse side can become visible in the finished knot.
Correct the twist before continuing rather than trying to hide it afterward.
Making the Knot Too Large
A bigger knot is not necessarily a better knot.
A Full Windsor made from a thick tie can overwhelm a narrow collar. Conversely, an extremely slim Four-in-Hand may leave too much empty space in a very wide spread collar.
Think in terms of proportion.
Ignoring the Narrow End
The narrow blade should normally remain hidden behind the wide blade when viewed from the front.
Many ties include a keeper loop on the reverse side of the wide blade. You can pass the narrow end through it after tying.
Forgetting to Center the Knot
Before leaving the mirror, check that the knot is centered between the collar points.
A small sideways adjustment can make the whole outfit look noticeably cleaner.
How to Tie a Tie for a Wedding
For a wedding, the right knot depends on the shirt collar, suit, tie fabric, and dress code.
A Half Windsor is an easy default for many conventional wedding outfits because it creates a clean, balanced shape without the bulk of a Full Windsor. A Four-in-Hand can work well with slimmer or less formal tailoring, while the Full Windsor suits wider collars and a more structured look.
If the invitation specifies black tie, remember that traditional black-tie dress normally calls for a bow tie rather than a standard long necktie.
Whatever knot you use, spend more time on fit than complexity. Correct length, a neat collar, a centered knot, and a clean dimple usually matter more than tying an elaborate decorative knot.
How to Tie a Tie for a Job Interview
For an interview, keep the knot simple and proportionate.
The Four-in-Hand, Half Windsor, and Full Windsor can all work. Your shirt collar should guide the choice.
The Half Windsor is particularly useful when you want a symmetrical, conventional appearance without creating an unusually large knot.
Make sure the finished tie reaches approximately the belt line, the knot is centered, and the narrow blade is not visible below the wide blade.
The goal is not to make someone notice your knot. It is to make the tie look so natural and well fitted that it does not become a distraction.
Can You Tie a Tie Without a Mirror?
Yes.
A mirror makes learning easier because you can immediately spot twisting, incorrect length, or an off-center knot. Once muscle memory develops, however, simple knots such as the Four-in-Hand can be tied largely by feel.
An effective way to learn is to practice slowly several times rather than trying to memorize verbal instructions immediately before an event.
Pay attention to the sequence:
over → behind → across → up → through.
That simple movement pattern describes the core of the Four-in-Hand and is much easier to remember than a long list of directions.
What Is the Easiest Way to Tie a Tie?
For most beginners, the Four-in-Hand is the easiest tie knot to learn. Ties.com rates it at its lowest difficulty level, while other current style guides likewise describe it as a practical everyday knot.
It requires relatively few movements, uses less tie length than larger knots, and does not depend on perfect symmetry.
That last point matters.
A Four-in-Hand is supposed to be slightly asymmetrical. If yours leans subtly to one side, you have not necessarily made a mistake.
Once you can tie it comfortably, learn the Half Windsor. The movements will already feel familiar, but you will gain another option when you need a fuller and more symmetrical knot.
How to Tie a Tie Properly Every Time
Learning how to tie a tie is less about memorizing dozens of knots and more about mastering a few fundamentals.
Start with the Four-in-Hand: wide end over the narrow end, behind it, across the front, up through the neck opening, and down through the front loop. Tighten gradually rather than aggressively.
Then check the details. The wide blade should finish around your belt line, the knot should suit your collar width, and the tie should sit comfortably against your neck. Add a small dimple beneath the knot for extra shape.
Once that becomes automatic, practice the Half Windsor for a balanced triangular knot and the Full Windsor when a larger knot better suits a spread collar.
A few deliberate practice attempts are usually far more useful than learning increasingly complicated knots. Master one simple knot first, get the length and proportions right, and you will have a reliable method ready for work, interviews, weddings, graduations, and other formal occasions.