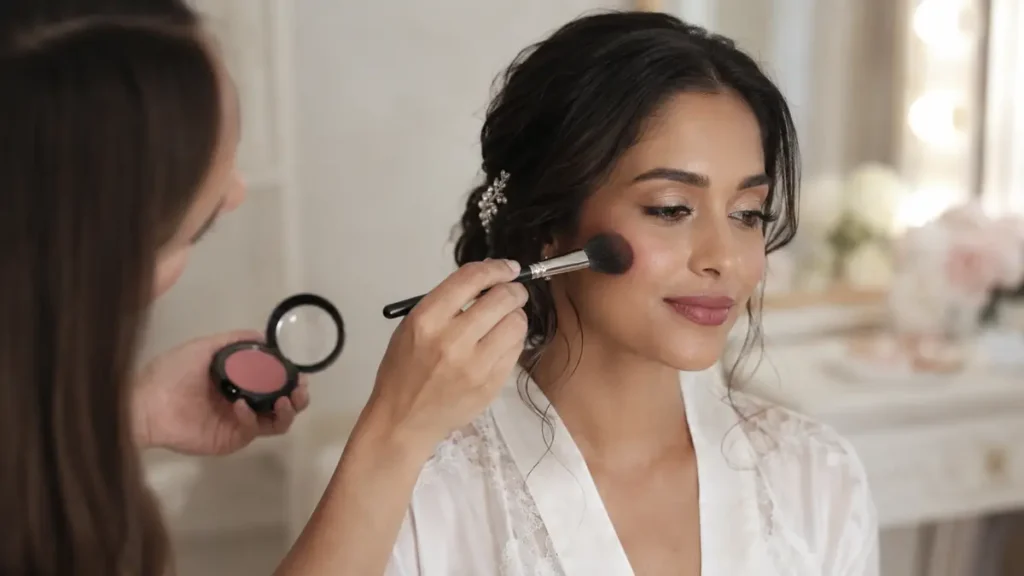
Your wedding makeup has an unusually demanding job. It must look polished in person, photograph beautifully in several kinds of light, survive tears and heat, and still feel like you many hours later.
Wedding makeup is a personalized, camera-ready beauty look designed to complement your features, skin tone, outfit, venue, and personal style while lasting throughout the celebration. The best result comes from thoughtful skin preparation, a well-tested foundation, balanced definition, waterproof eye products, and a bridal makeup trial under realistic lighting.
There is no single correct bridal look. Natural, soft-glam, classic, romantic, matte, dewy, and full-glam styles can all work beautifully. The real goal is to choose a look that feels comfortable, holds up under real conditions, and does not disguise the person wearing it.
What Makes Wedding Makeup Different?
Everyday makeup may only need to survive a commute or a few hours at work. Bridal makeup often needs to remain presentable through preparation, portraits, a ceremony, hugs, dinner, dancing, and changing temperatures.
It also has to work for two audiences: people standing nearby and the camera.
A photographer’s lighting can soften color and reduce facial definition. Makeup that looks perfectly balanced in a mirror may appear faint in photographs. That does not mean a bride needs heavy contouring or an opaque foundation. It means features such as the brows, lash line, cheeks, and lips usually need deliberate definition.
Good bridal makeup should provide:
- Comfortable, skin-like coverage
- Even color without masking natural texture
- Enough definition for photography
- Resistance to tears, sweat, oil, and humidity
- A cohesive relationship with the dress and accessories
- A finish that still looks recognizable in future photographs
- Products suited to the wearer’s skin type and sensitivities
The ideal result is not simply “more makeup.” It is strategically applied makeup.
How to Choose Your Wedding Makeup Style
Start with the way you normally like to see yourself. Someone who rarely wears foundation may feel uncomfortable in dramatic full coverage, even if the application is technically flawless. A regular wearer of winged liner and bold lipstick may feel unfinished in barely-there makeup.
Save reference images, but study them carefully. Editing, filters, studio lights, cosmetic procedures, false lashes, and the model’s natural features can all affect the final appearance. Inspiration works best when the person in the image has a similar skin tone, eye shape, facial structure, or beauty style.
Natural bridal makeup
Natural wedding makeup uses sheer-to-medium coverage, softly defined eyes, subtle contour, fresh blush, groomed brows, and a lip shade close to the wearer’s natural coloring.
“Natural” does not necessarily mean fewer products. Creating seamless skin that remains polished for hours can require careful color correction, thin foundation layers, targeted concealer, and selective powder.
This style suits brides who want to look fresh, familiar, and understated. It also pairs well with intimate ceremonies, daytime weddings, garden venues, and minimalist dresses.
Soft-glam wedding makeup
Soft glam sits between natural and dramatic makeup. It typically includes a satin complexion, neutral eyeshadow, softly smoked eyeliner, fuller lashes, refined brows, dimensional cheeks, and a nude, rose, peach, or mauve lip.
This is one of the most adaptable bridal styles because it provides enough contrast for photographs without overpowering the face. The intensity can be adjusted for different eye shapes, skin tones, and cultural traditions.
Classic bridal makeup
Classic makeup favors enduring details rather than highly recognizable trends. Common elements include:
- A satin or natural-looking base
- Neutral taupe, champagne, bronze, or brown eyeshadow
- Defined lashes and brows
- Rosy or peach-toned cheeks
- A balanced pink, nude, or red lip
Classic does not have to mean conservative. A crisp black liner or red lipstick can feel timeless when the remaining features are kept clean and balanced.
Full-glam bridal makeup
Full glam typically uses fuller coverage, sculpted cheeks, more pronounced eye makeup, false lashes, and stronger lip definition. It works particularly well for evening receptions, elaborate outfits, dramatic venues, and brides who regularly enjoy glamorous makeup.
The main risk is adding too much texture. Heavy foundation, dense powder, thick concealer, and severe contour may become visible in high-resolution photographs. Thin, controlled layers usually look more sophisticated than one heavy application.
Romantic and ethereal makeup
Romantic bridal makeup often features luminous skin, diffused eyeliner, creamy blush, delicate shimmer, feathery lashes, and soft pink, berry, or peach lips. The edges remain blended rather than graphic.
An ethereal look may add pearlescent highlights or pastel tones, but shimmer should be placed selectively. Too much reflective product across textured areas can emphasize pores and fine lines.
Bold and culturally expressive looks
Wedding makeup does not need to follow a neutral Western bridal template. Indian, Pakistani, Middle Eastern, African, East Asian, and other wedding traditions may incorporate kohl, metallic shadow, vivid lipstick, elaborate jewelry, rich fabrics, or highly defined eyes.
For multi-event weddings, the makeup can change between the engagement, mehndi, sangeet, nikah, ceremony, and reception. One event might feature fresh peach tones, while another uses gold eyeshadow, black liner, and a berry or red lip.
The strongest look respects both the cultural setting and the bride’s preferences rather than treating tradition as a costume.
Quick takeaway: Choose the level of intensity you already enjoy, then adjust the finish and durability for photography and all-day wear.
Match Wedding Makeup to Your Features and Setting
A beautiful inspiration photo is only a starting point. The look must be translated to the actual person, clothing, lighting, weather, and venue.
Work with your skin tone and undertone
Foundation should match both the depth and undertone of the skin. Common undertone descriptions include warm, cool, neutral, olive, golden, and peach. The face should also connect naturally with the neck, chest, and shoulders.
Testing foundation only on the hand is unreliable because hand and facial coloring often differ. Compare potential shades along the jaw and observe them in daylight after they have had time to settle. Some formulas oxidize and become darker or warmer as they dry.
Color cosmetics should also support the complexion:
| Undertone | Often-flattering cheek and lip families | Useful eye tones |
|---|---|---|
| Cool | Rose, berry, mauve, blue-red | Taupe, plum, cool brown, silver |
| Warm | Peach, coral, terracotta, warm red | Bronze, copper, gold, warm brown |
| Neutral | Pink-beige, rosewood, balanced red | Champagne, cocoa, soft metallics |
| Olive | Apricot, muted rose, brick, caramel | Antique gold, bronze, plum, khaki |
These are guidelines, not restrictions. Contrast, personal taste, and the colors in the wedding outfit matter just as much.
Consider eye color and shape
Warm champagne, bronze, taupe, coral, and brown can emphasize blue eyes. Plum, burgundy, bronze, and warm brown often bring out green or hazel eyes. Brown eyes work with almost every palette, including copper, gold, chocolate, navy, and jewel tones.
Eye shape affects placement more than eye color does. Hooded eyes benefit from definition placed where it remains visible when the eyes are open. Deep-set eyes may need less darkness in the crease, while downturned eyes can be subtly lifted by directing liner and shadow upward at the outer corner.
False lashes should be trimmed and fitted to the eye. A heavy, untrimmed strip can make smaller or hooded eyes appear closed. Individual clusters or half lashes often create softer definition.
Coordinate with the outfit and jewelry
A pure white dress, ivory gown, gold lehenga, heavily embroidered sari, and minimalist suit each create a different visual context. Makeup need not match the outfit exactly, but the color temperature and intensity should feel connected.
Also consider:
- The neckline and amount of exposed skin
- Gold, silver, pearl, or colored jewelry
- Veil details and headpieces
- Hair color and hairstyle
- Floral colors
- The groom’s or wedding party’s attire
If the clothing and jewelry are elaborate, balanced makeup can prevent visual competition. If the outfit is simple, a bold lip or stronger eye may become a deliberate focal point.
Account for venue, season, and lighting
An outdoor summer ceremony calls for oil control, sweat resistance, and lightweight layers. A winter wedding in a dry climate may require additional hydration and less powder. Beach ceremonies introduce wind, humidity, salt, and bright sunlight.
Daylight reveals blending and texture clearly. Dim ballrooms can absorb subtle colors, while direct camera flash can change how reflective powders and base products appear.
Ask the photographer about the expected lighting, but do not rely on the claim that every product containing SPF automatically causes flashback. The effect depends on the formula, quantity, reflective ingredients, skin preparation, exposure, and flash position. Test the complete base with the photographer or under comparable lighting.
Prepare Your Skin Without Causing Last-Minute Problems
Healthy-looking makeup begins with a calm, hydrated surface. It does not require an aggressive pre-wedding transformation.
The safest strategy is consistency. If your existing cleanser, moisturizer, acne treatment, or dermatologist-directed routine works, continue it. Introducing strong acids, retinoids, peels, extractions, or unfamiliar facials immediately before the ceremony can cause irritation, flaking, breakouts, or swelling.
Skin-care products—including products marketed as “natural” or “clean”—can cause contact dermatitis, according to the American Academy of Dermatology. Test unfamiliar cosmetics in advance and stop using anything that causes burning, itching, swelling, or a persistent rash.
A practical pre-wedding skin timeline
Three to six months before
Address persistent acne, rosacea, eczema, hyperpigmentation, or other concerns with a qualified dermatologist. Meaningful changes require time, and some treatments can initially cause dryness or irritation.
Four to eight weeks before
Keep the routine stable. Test any planned facial, brow treatment, self-tanner, lash adhesive, or new complexion product early enough to observe how the skin responds.
One week before
Avoid experimental treatments. Use gentle cleansing, regular moisturizer, and sun protection. Do not pick blemishes; doing so can prolong inflammation and increase the chance of discoloration or scarring.
The night before
Cleanse, moisturize, and get adequate rest where possible. Skip an unfamiliar mask or harsh exfoliant. Overloading the face with occlusive products may also leave it puffy or difficult to prep the next morning.
The wedding morning
Use a familiar gentle cleanser and a lightweight moisturizer appropriate for your skin. Allow skin care to absorb before applying primer or complexion products.
Adjust preparation for skin type
For oily skin, use light hydration rather than removing every trace of oil. An overly stripped complexion may become irritated or produce more visible surface oil. Apply mattifying primer mainly through the T-zone.
Dry skin benefits from gentle cleansing, moisturizer, and flexible complexion formulas. Place powder only where necessary rather than covering the whole face heavily.
Combination skin usually needs zoned preparation: oil control through the center of the face and additional hydration around drier areas.
Sensitive or rosacea-prone skin often responds better to fragrance-free products and minimal experimentation. The AAD advises people with rosacea to choose products for sensitive skin and avoid common irritants such as astringents.
Mature skin generally looks more natural with lightweight, flexible layers, creamy concealer, restrained powder, and softly blended definition. Excessively matte products can settle into fine lines and flatten the complexion.
Why a Wedding Makeup Trial Matters
A bridal makeup trial is a full rehearsal, not merely a preview. It allows you and the makeup artist to refine colors, coverage, lashes, skin preparation, and timing before the pressure of the wedding day.
Many artists recommend scheduling it roughly two to four months before the ceremony, although availability and wedding complexity may require an earlier booking. Try to have the dress, jewelry, hairstyle, and general color palette selected first.
Bring:
- Several relevant inspiration images
- A photograph of the outfit and accessories
- Your veil or headpiece, if practical
- Products you must use because of sensitivity
- The lipstick or touch-up product you plan to carry
- Notes about allergies, reactions, contact lenses, or skin conditions
- A white or outfit-colored top to assess the overall effect
Explain what you like about each reference. “I like the luminous skin and softly defined eyes” is more useful than asking for an exact copy of a face with different features.
Test the trial under real conditions
Check the makeup:
- Close up in a mirror
- From normal conversational distance
- In indirect daylight
- Under indoor light
- With phone and professional-style flash
- After several hours of wear
Smile, laugh, and move your face. Observe whether the concealer creases, foundation separates, mascara transfers, lashes lift, or lipstick becomes uncomfortable.
Photograph the result from the front and both sides. Color may look different on camera than it does in the mirror. If possible, wear the makeup during an engagement session or another photographed event.
Give specific feedback. Instead of saying the look feels wrong, identify whether the brows are too dark, the base feels heavy, the lashes obscure your eyes, or the lip color changes your complexion.
Quick takeaway: A successful trial produces a repeatable plan—products, shades, placements, photographs, timing, and agreed adjustments.
A Step-by-Step Wedding Makeup Application
The exact technique varies, but reliable bridal application follows a controlled sequence built around thin layers.
1. Prepare the skin
Cleanse gently and apply suitable moisturizer. Let each layer settle rather than immediately stacking multiple products.
Use primer only where it serves a purpose. A smoothing primer may help around visible pores, a gripping primer can support longevity, and a mattifying formula may control shine. Applying several incompatible primers can cause pilling or separation.
2. Correct only where needed
Color corrector can reduce the amount of concealer required. Peach or orange tones may neutralize blue or purple darkness, with the depth adjusted to the skin tone. Green can reduce localized redness.
Apply a small amount and blend the edges. Correction should disappear beneath foundation rather than become another thick layer.
3. Build a durable complexion
Choose a foundation compatible with both the skin preparation and desired finish. Satin and natural finishes are especially versatile because they provide life without excessive shine.
Apply a thin layer from the center of the face outward. Add coverage only over redness, blemishes, or uneven areas. This usually photographs better than applying full coverage everywhere.
Check the jaw, ears, hairline, neck, and exposed chest. The goal is visual continuity, not painting every area with foundation.
4. Conceal precisely
Place concealer on discoloration rather than creating a thick triangle beneath each eye. Use a flexible formula around mobile areas and a more durable formula for blemishes if necessary.
Allow a small amount to settle, blend it, and set selectively. Too much product under the eyes can make creasing more obvious.
5. Add soft dimension
Contour creates shadow; bronzer adds warmth. They are not interchangeable.
Apply contour sparingly beneath the cheekbones, along the jaw, or around the forehead where natural structure calls for it. Blend until there are no obvious stripes. Add bronzer where the sun would naturally warm the face.
Heavy contour can appear severe in person and may make the face look disconnected from the body.
6. Layer blush for lasting color
Photography can reduce the apparent intensity of blush, so apply enough to remain visible without producing a hard patch.
For better wear, use a thin cream or liquid blush and reinforce it with a coordinating powder blush. Peach, rose, mauve, berry, terracotta, and coral cover a wide range of complexions.
Blush placement can subtly alter the face. Higher placement creates lift; placement on the apples gives a youthful, romantic effect.
7. Define the brows
Brows frame the entire look. Fill sparse areas with fine strokes, then set them without making the front blocky.
Follow the natural structure rather than forcing an unfamiliar shape on the wedding day. Overly dark brows can dominate photographs, especially with pale clothing.
8. Build the eye makeup
Prime the eyelids to reduce creasing and help color last. Create dimension with transitional and deeper shades, keeping placement appropriate for the eye shape.
Use shimmer strategically on the lid or inner corner. Define the lash line with pencil, gel, liquid liner, or dark eyeshadow. Tightlining can add density without a visibly thick line.
Choose waterproof or water-resistant eyeliner and mascara, and test them in advance. Waterproof does not automatically mean smudge-proof on every eye shape or skin type.
If using lashes, ensure the adhesive is fully dry and the band is secure at both corners. Anyone with adhesive sensitivity should test it well before the event.
9. Finish the lips
Prepare dry lips earlier with regular balm and gentle care. Immediately before lipstick, remove excess balm so the color can adhere.
Define the lip shape with liner, then layer lipstick in thin coats. Blotting and reapplying can improve longevity. Matte liquid lipstick often lasts well but may feel dry; creamy formulas feel comfortable but require more frequent touch-ups.
A natural bridal lip does not need to be pale. Rose, caramel, terracotta, berry, mauve, and balanced reds may look more harmonious than a light beige nude.
10. Set strategically
Use finely milled powder where makeup tends to crease or become oily: commonly around the nose, under the eyes, between the brows, and across the chin.
Setting spray can help merge powder layers and improve wear, but it cannot rescue incompatible skin care or an overloaded base. Let each mist dry naturally before adding another product.
How to Make Wedding Makeup Last All Day
Long-lasting bridal makeup comes from preparation and restraint. Piling on extra foundation and powder often creates cracking rather than durability.
Use these principles:
- Apply multiple thin layers instead of one thick layer.
- Let skin care absorb before beginning the base.
- Pair compatible cream and powder cheek products.
- Keep rich eye cream away from areas prone to mascara transfer.
- Use eye primer beneath shadow and liner.
- Test waterproof products before trusting them.
- Blot oil before applying more powder.
- Avoid repeatedly touching or wiping the face.
- Drink through a straw only when practical and permitted; otherwise, sip carefully and check the lip afterward.
- Press tears gently near the tear duct instead of dragging a tissue across the face.
For hot or humid weddings, keep foundation light, place shine control only where needed, and prioritize water-resistant products. For dry conditions, use flexible formulas and avoid repeatedly powdering the face.
Build a small touch-up kit
A practical kit might contain:
- The exact lip liner and lipstick used
- Blotting papers
- A pressed powder with a small puff
- Cotton swabs
- Tissues
- Lash adhesive
- Concealer for emergencies
- A compact mirror
- Breath mints
Assign the kit to a trusted friend, attendant, or coordinator. The bride should not have to locate it during portraits.
Blot first, then powder. Adding powder directly over sweat or oil can create a thick, uneven patch.
Professional Artist or DIY Wedding Makeup?
Both options can work. The better choice depends on your confidence, budget, schedule, and desired complexity.
| Consideration | Professional artist | DIY makeup |
|---|---|---|
| Application experience | Usually trained for varied faces and conditions | Depends on personal skill |
| Morning workload | Reduces the bride’s responsibilities | Requires protected preparation time |
| Product access | Broad kit and shade selection | Complete control over familiar products |
| Cost | Higher service and possible travel fees | May be lower, unless many products are purchased |
| Consistency | Strong when supported by a detailed trial | Strong after repeated practice |
| Hygiene | Should follow professional sanitation standards | Easier to control with personal products |
| Stress level | Helpful if you trust the artist | Calmer for some people who dislike being made up |
When hiring an artist, review unfiltered close-ups across different skin tones, ages, and textures. Ask about sanitation, allergies, assistant staffing, travel, timing, touch-ups, false lashes, trial fees, and what happens if the artist becomes unavailable.
A professional should listen rather than insist that bridal makeup must be heavy. They should also clean brushes properly, use disposable mascara wands and lip applicators where appropriate, and avoid double-dipping.
How to do your own bridal makeup successfully
DIY wedding makeup is most realistic when you already feel comfortable applying makeup and can practice the complete look repeatedly.
Do at least three full rehearsals:
- A technique test to refine placement
- A longevity test lasting as long as the wedding
- A timed dress rehearsal under expected lighting and weather
Write down every product and step. Clean your brushes, sharpen pencils, check expiration and performance, and pack duplicates of essential items where possible.
On the wedding morning, allow more time than you think you need. Interruptions are almost guaranteed.
Common Wedding Makeup Mistakes
Following trends that do not feel personal
A highly glazed complexion, laminated brow, dramatic cut crease, or overlined lip may look current now but feel unfamiliar later. Trends work best as accents inside an otherwise personal look.
Trying new treatments too close to the wedding
Strong peels, injectables, waxing, facials, lash treatments, or unfamiliar skin care can cause an unexpected reaction. Schedule treatments early enough for the skin to recover and follow guidance from a qualified professional.
Wearing too much base
More product does not automatically produce better photographs. Texture is normal. A thin, even complexion with targeted correction usually looks fresher than a mask of full-coverage foundation.
Ignoring the body
If the shoulders, neck, chest, or back are visible, check that their color and finish connect naturally with the face. Body makeup should be transfer-resistant and tested against the actual fabric.
Testing makeup only in bathroom lighting
Indoor lighting may hide an incorrect foundation match or overly strong contour. Always inspect the trial in daylight and photograph it with and without flash.
Forgetting comfort
Heavy lashes, sticky gloss, tightlining that irritates the eyes, or a drying lipstick can become distracting over a long day. Comfort is part of performance.
Leaving the timeline too tight
Bridal makeup often takes 60 to 90 minutes, depending on complexity, though the artist should provide the final estimate. Build in additional time for interruptions, dressing, photographs, and corrections. Aim to be finished before portraits begin rather than at the exact starting time.
Your Final Wedding Makeup Checklist
Before the wedding, confirm that:
- The makeup style feels like you.
- The foundation shade has been checked in daylight.
- The complete look has been photographed with and without flash.
- Every product has passed a multi-hour wear test.
- Eye products can withstand tears and normal blinking.
- False lashes feel comfortable and secure.
- The lip color is available for touch-ups.
- Skin sensitivities and allergies have been communicated.
- The artist has the venue address and confirmed start time.
- The getting-ready space has a table, chair, outlets, and good light.
- Enough time is reserved for every person receiving services.
- A trusted person knows where the touch-up kit is.
- No risky new skin treatment is planned near the ceremony.
Creating Wedding Makeup That Still Feels Like You
The best wedding makeup is not the heaviest, trendiest, or most expensive look. It is the one that supports your features, complements the celebration, withstands real conditions, and lets you remain comfortable in your own face.
Choose a style based on how you genuinely like to look. Prepare your skin consistently, conduct a realistic trial, photograph everything, test for longevity, and record the final products and techniques. With those decisions settled in advance, wedding makeup becomes one less thing to worry about—and a natural part of the day rather than a disguise.