Planning a wedding can feel simple at first: choose a date, find a venue, invite people, and celebrate. Then the decisions multiply. Contracts, guest counts, outfits, catering, photography, transportation, legal paperwork, seating plans, payments, and dozens of smaller details suddenly compete for attention.
A well-organized wedding checklist turns that long collection of decisions into a timeline. Instead of wondering what you should be doing next, you can concentrate on the tasks that actually matter at each stage.
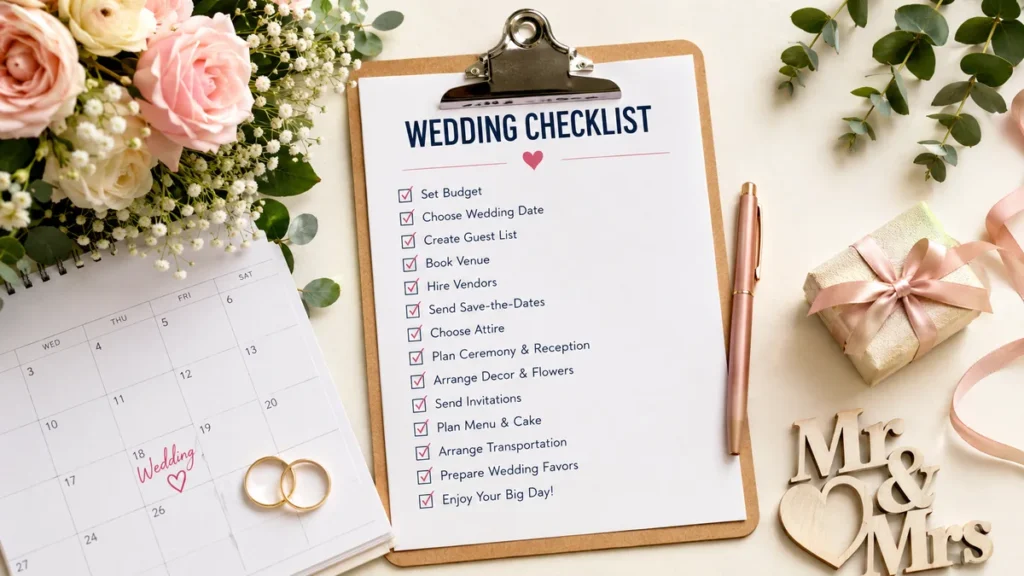
A wedding checklist is a chronological wedding planning to-do list covering your budget, guest list, venue, vendors, attire, invitations, ceremony, reception, legal requirements, logistics, and post-wedding tasks. Most couples can begin with a 12-month framework, then move deadlines earlier or later according to their wedding date, location, traditions, and event size.
This guide follows that flexible approach, taking you from the first planning decisions through the weeks after the celebration.
Wedding Checklist: What to Do First
Before booking photographers or deciding which flowers should appear on the tables, establish the boundaries of the wedding.
The four decisions that shape almost everything else are your budget, approximate guest count, preferred date or season, and venue requirements. Major wedding-planning checklists consistently place these foundational decisions near the beginning because choices made here affect vendor availability, catering costs, capacity, accommodation, stationery, and practically every later decision.
Set the wedding budget
Start by determining how much money is realistically available and who, if anyone, will contribute.
Avoid creating a budget based only on attractive inspiration photos. Instead, decide on a maximum figure you can comfortably afford and break spending into categories such as:
- Venue and catering
- Photography and videography
- Attire and alterations
- Flowers and décor
- Entertainment
- Stationery
- Transportation
- Beauty services
- Rentals
- Ceremony expenses
- Gifts and favors
- Accommodation
- Honeymoon
- Tips, fees, taxes, and unexpected costs
Keep some money unallocated. Small expenses often appear late in the process: delivery charges, alterations, overtime, transportation changes, vendor meals, printing, accessories, gratuities, or last-minute rentals.
Draft the guest list
Your guest count is not just an invitation decision. It influences the size of venue you need and can change catering, rentals, stationery, transport, staffing, favors, and accommodation costs.
Create a preliminary list rather than waiting until invitations are ready.
At this stage, you do not need every address. You need a realistic estimate.
Choose possible dates
Pick a preferred date plus one or two alternatives if you can.
Being flexible can make venue and vendor selection considerably easier. If there is a religious holiday, major local event, school schedule, family commitment, or seasonal weather issue that could affect attendance, investigate it before signing contracts.
Decide what kind of wedding you are planning
A useful checklist changes according to the event.
Ask yourselves whether you are planning a:
- Traditional ceremony and reception
- Religious wedding
- Civil ceremony
- Destination wedding
- Cultural or multi-day wedding
- Backyard wedding
- Micro-wedding
- Elopement
- Large formal celebration
For multi-event celebrations, create a separate mini-checklist for every function. Pakistani and Indian weddings, for example, may involve distinct ceremonies and celebrations requiring separate outfits, vendors, décor plans, transportation, and schedules.
Quick takeaway: Budget, guest count, possible dates, and event format come before decorative decisions. They establish the boundaries within which everything else has to work.
12 to 18 Months Before the Wedding
If you have more than a year, use the extra time strategically rather than trying to finish everything immediately.
Popular venues and specialist vendors can have limited availability, so couples planning a busy-season, destination, large, or highly customized wedding may benefit from starting earlier than the conventional 12-month timeline. Current planning guides commonly use 12 months as a standard framework while allowing longer lead times when circumstances require them.
Build your planning system
Create one central place for wedding information.
It can be a spreadsheet, planning app, digital folder, notebook, or combination of tools. The format matters less than consistency.
Track:
- Budgeted versus actual spending
- Deposit amounts
- Vendor balances
- Payment due dates
- Contracts
- Guest contact information
- RSVPs
- Dietary requirements
- Vendor phone numbers
- Appointment dates
- Inspiration and design decisions
The Knot, WeddingWire, Zola and similar platforms organize checklists alongside budgets, guest lists, vendors, seating charts, and other planning tools, reflecting how interconnected these tasks become.
Research and book the venue
Venue selection is one of the highest-priority tasks because it can determine the confirmed date, guest capacity, location, permitted vendors, catering setup, accessibility, curfew, and rental requirements.
Before paying a deposit, understand exactly what the venue price includes.
Ask about furniture, setup, cleanup, staffing, catering restrictions, alcohol rules, parking, accessibility, rain plans, power supply, restrooms, security, overtime, and cancellation or postponement terms.
For an outdoor wedding, backup weather arrangements deserve the same attention as the primary setup. Outdoor events can also require additional planning for lighting, electricity, temperature control, restroom access, terrain, and weather protection.
Consider a wedding planner or coordinator
Not every wedding needs a full-service planner.
You might choose full planning, partial planning, month-of coordination, or day-of coordination depending on the complexity of the celebration and how much you want to manage personally.
If you will coordinate everything yourself, assign responsibilities clearly rather than assuming relatives or wedding-party members will automatically know what needs doing.
Start researching priority vendors
Once the date and venue are confirmed, begin comparing the professionals whose availability could affect the event most.
Depending on the wedding, these may include:
- Photographer and videographer
- Caterer
- Planner or coordinator
- Officiant
- Entertainment
- Florist or decorator
- Hair and makeup team
- Rental company
Before signing any contract, check the services included, deposit requirements, cancellation terms, rescheduling policy, overtime rates, delivery charges, travel fees, final-payment deadline, and what happens if the named professional becomes unavailable.
9 to 12 Months Before: Book the Core Wedding Vendors
This part of the wedding checklist is about turning your initial plan into confirmed arrangements.
If you are beginning with less than nine months, do not panic. Work through the same priorities in compressed form: date and venue first, then the vendors whose availability matters most.
Confirm photography and videography
Compare complete portfolios rather than judging photographers from a handful of social-media highlights.
Discuss:
- Hours of coverage
- Number of photographers
- Engagement session
- Getting-ready coverage
- Ceremony restrictions
- Family-photo list
- Travel
- Delivery timeline
- Album options
- Video format
- Raw-file policies
- Overtime rates
Your photographer should eventually receive an organized list of important people and combinations, but avoid creating an enormous shot list that prevents them from documenting spontaneous moments.
Finalize catering
If catering is not included with the venue, confirm a caterer relatively early.
Clarify menus, service style, staffing, beverages, dietary accommodations, children’s meals, vendor meals, rentals, cake service, cleanup, taxes, and service charges.
Your early guest number will be approximate. The caterer generally needs a more accurate final count closer to the wedding.
Book entertainment
Depending on the event, this could mean a DJ, band, ceremony musicians, cultural performers, or multiple entertainment providers.
Discuss sound equipment, microphones, power requirements, setup time, song requests, do-not-play selections, announcements, and the schedule for important moments.
Choose an officiant
Your officiant may play a legal, religious, cultural, or ceremonial role.
Discuss the structure of the ceremony early, particularly if premarital meetings, religious documents, custom vows, readings, or rehearsals will be required.
Start shopping for wedding attire
Custom and made-to-order clothing can require substantial production and alteration time, so do not automatically postpone attire until the final months.
Think about the entire look rather than only the main garment: shoes, undergarments, jewelry, veil or headwear, accessories, tailoring, steaming, and backup solutions may all need attention.
6 to 9 Months Before: Guests, Attire, Travel, and Design
By now, the major structural decisions should be taking shape.
This is a good point to build the guest experience and visual details around what you have already booked.
Create or update the wedding website
A wedding website can centralize practical information for guests.
Useful details include the date, location, directions, accommodation, transportation, dress code, schedule, registry information where relevant, and answers to travel questions.
Do not publish details that are still uncertain.
Send save-the-dates if needed
Save-the-dates are particularly useful when guests will need significant travel or accommodation planning.
They are not mandatory for every wedding. For a small local celebration planned relatively quickly, formal invitations may be sufficient.
Arrange accommodation
If many guests are traveling, investigate nearby hotels and room blocks.
Explain clearly whether guests are responsible for making and paying for their own reservations and note any booking deadline associated with a hotel block.
Plan the honeymoon
If international travel is involved, check passport validity and destination entry requirements well ahead of departure rather than treating travel documents as a wedding-week task.
For U.S. travelers, for example, the State Department currently lists routine passport processing at 4–6 weeks and expedited processing at 2–3 weeks, excluding additional mailing time, so early preparation provides useful margin.
Travel requirements vary by nationality and destination, so use the relevant government authority rather than relying on a wedding blog for entry rules.
Develop the wedding design
Now translate your overall style into practical choices.
Consider:
- Flowers
- Ceremony backdrop
- Tables
- Linens
- Lighting
- Signage
- Stationery
- Rentals
- Stage or dance floor
- Lounge furniture
- Candles
- Table numbers
- Place settings
Before adding something because it appears on a wedding inspiration board, ask whether it improves the guest experience or meaningfully contributes to the atmosphere.
That question prevents decorative spending from expanding without control.
Confirm wedding-party attire
Give attendants enough time to order clothing and arrange alterations.
Communicate clearly about colors, shoes, accessories, payment responsibilities, and how much freedom each person has.
4 to 6 Months Before: Turn the Plan Into Guest-Facing Details
At this stage, you know enough about the wedding to begin finalizing many of the details guests will actually experience.
Order wedding invitations
Invitation timing varies with destination, culture, travel needs, and how early guests need information.
Before printing a large quantity, proofread:
- Names
- Date
- Ceremony time
- Venue
- Address
- RSVP deadline
- Website address
- Dress code
- Additional event details
Have another person proofread too. Once hundreds of invitations are printed, a small typo becomes expensive.
Arrange transportation
Determine who needs transportation and when.
That could include the couple, wedding party, immediate family, or guests traveling between hotels, the ceremony, and the reception.
Build extra time into routes. A technically possible 20-minute transfer can turn into a problem when traffic, parking, loading passengers, photography, or unfamiliar drivers are involved.
Purchase wedding rings
Do not leave rings until the final week. Sizing, engraving, ordering, or adjustments may require time.
Decide in advance who will be responsible for bringing them to the ceremony.
Plan the ceremony structure
Work with your officiant on:
- Processional
- Opening
- Readings
- Cultural or religious rituals
- Vows
- Ring exchange
- Marriage declaration
- Signing requirements
- Recessional
If you are writing personal wedding vows, start with rough ideas now. Good vows usually improve after editing and speaking them aloud.
Plan the reception flow
Think beyond individual activities and look at how the evening moves.
A reception timeline might include arrival, introductions, dinner, speeches, first dance, family dances, entertainment, cake cutting, dancing, and departure.
You do not need to include every traditional moment. Remove anything that does not fit the couple or celebration.
2 to 4 Months Before: Invitations, Menu, Beauty, and Logistics
The focus now shifts from choosing vendors to giving them precise information.
Send invitations and track RSVPs
Use a tracking system from the moment responses begin.
Record attendance, meal selections where relevant, dietary requirements, accessibility needs, and any related-event attendance.
Do not rely on memory or scattered messages.
Finalize food and drinks
Attend tastings when offered and confirm the planned menu.
Ask how allergies and dietary requirements will be identified and handled. Confirm children’s meals and vendor meals if applicable.
Schedule hair and makeup trials
A beauty trial lets you test the practical result, not merely show reference photos.
Wear the look for several hours if possible and photograph it in different lighting.
Bring accessories or headpieces when they affect the final style.
Schedule attire alterations
Take the actual wedding shoes and relevant undergarments to fittings because they can affect fit and length.
Do not assume a finished garment means alterations are finished. Check movement, sitting, walking, fastening, comfort, and how it behaves with accessories.
Order day-of stationery
Depending on the celebration, this may include menus, programs, seating displays, place cards, escort cards, table numbers, welcome signs, reserved-seat cards, or directional signs.
Wait until information is reasonably stable before printing pieces that contain guest names or seating assignments.
1 to 2 Months Before: Marriage Documents, Seating, and Vendor Confirmation
The final months are when small unresolved decisions can begin causing unnecessary stress.
Use the wedding checklist to shift from creating new ideas to closing open decisions.
Obtain the marriage license or required legal documents
Do not assume there is one universal deadline.
Marriage-license rules can vary significantly by jurisdiction, including where you apply, documentation requirements, waiting periods, expiration dates, fees, and who may conduct the ceremony. For example, North Carolina currently has no waiting period after issuance and a license expires after 60 days, while Maryland generally makes a license effective on the second calendar day and valid for six months.
Check the official authority for the exact place where the legal marriage will occur.
For religious or cultural ceremonies, ask early whether additional paperwork, witnesses, counseling, or documentation is required.
Build the seating plan
Wait until RSVPs are mostly complete before attempting the final chart.
Start with household groups and close relationships, then consider age, accessibility, family dynamics, and conversational compatibility.
The goal is not to engineer perfect friendships. It is to avoid obvious discomfort and create tables where guests have someone they can comfortably speak with.
Confirm the wedding-day timeline
Create one master schedule shared with the people who genuinely need it.
It should cover:
- Venue access
- Vendor arrivals
- Hair and makeup
- Getting-ready photography
- Couple portraits
- Wedding-party photos
- Family photos
- Ceremony
- Cocktail hour
- Reception entrance
- Meal service
- Speeches
- Special dances
- Cake cutting
- Entertainment
- Transportation
- Vendor departure
- Venue closing time
Build realistic buffers between activities.
A schedule in which every event begins immediately after the previous one leaves no room for traffic, restroom breaks, emotional moments, late relatives, or photography.
Hold final vendor meetings
Make sure vendors are working from the same version of the plan.
Confirm contact names, arrival times, loading instructions, addresses, parking, setup, final quantities, payment status, and emergency contacts.
If a coordinator is handling wedding-day questions, introduce that person to the vendors before the event.
2 to 4 Weeks Before: Close Every Open Loop
This is where good planning becomes visible.
Rather than starting new projects, finish what already exists.
Follow up with guests who have not replied. Provide the caterer and venue with final attendance numbers by their contractual deadlines. Complete the seating chart and stationery based on confirmed guests.
Prepare final vendor payments according to each contract and decide who will handle any payments, tips, or paperwork on the wedding day.
Finish vows and speeches, then practice them aloud.
Confirm transportation pickups, accommodation arrangements, rehearsal details, wedding-party responsibilities, ceremony items, and vendor arrival times.
Create the wedding-day contact sheet
One simple document can prevent dozens of unnecessary calls.
Include key vendor contacts, venue contact, planner or coordinator, transportation contact, immediate family contacts, wedding-party contacts, and the person authorized to make practical decisions if the couple is unavailable.
Do not make either partner the primary problem-solving contact once wedding-day preparations begin.
One Week Before: The Final Wedding Checklist
The final week should be about verification and preparation, not redesigning the celebration.
Use this last review:
- Confirm the latest guest count and seating plan.
- Reconfirm vendor arrivals and addresses.
- Check the weather and activate any prearranged backup plan.
- Pack wedding clothing and accessories.
- Check the rings.
- Prepare legal documents.
- Pack décor and personal ceremony items.
- Prepare payment or tip envelopes where appropriate.
- Charge phones and portable chargers.
- Pack an emergency kit.
- Share the final timeline with essential participants.
- Rehearse the ceremony if one is planned.
- Pack for the honeymoon if leaving soon after the wedding.
Current wedding-planning checklists similarly move from vendor confirmation and final guest counts into rehearsals, emergency kits, packing, final payments, and responsibility assignments during the last one to two weeks.
What should be in a wedding emergency kit?
Keep the kit practical.
Useful items may include safety pins, fashion tape, sewing supplies, stain remover, tissues, bandages, pain relief you normally use safely, breath mints, bobby pins, hair products, makeup for touch-ups, deodorant, snacks, water, phone chargers, comfortable backup shoes, and spare accessory parts.
Martha Stewart’s updated wedding-day checklist similarly highlights wardrobe, beauty, health, ceremony, reception, and outdoor-event supplies as useful day-of preparation categories.
Give the kit to someone dependable instead of carrying it yourself.
Wedding Day Checklist: What Actually Matters
Your job on the wedding day is not to become the event manager.
A coordinator, planner, venue manager, trusted friend, or designated family member should know how to answer routine vendor questions.
Make sure the person responsible has access to the timeline, contracts or key details, vendor contacts, payment instructions, and any items that need to move between locations.
Eat before the ceremony. Drink water. Allow more time for getting ready than the absolute minimum. Keep legal paperwork and rings with specifically assigned people.
Then stop checking the checklist.
There comes a point when another five minutes of adjusting place cards is less valuable than being fully present at your own wedding.
Quick takeaway: A successful wedding day does not require every minute to happen exactly as written. The timeline creates coordination; it should not prevent you from enjoying the celebration.
How to Adjust a Wedding Checklist for a Short Engagement
What if you have only six months to plan a wedding?
Use the same sequence rather than trying to copy a 12-month calendar literally.
Start with budget, guest count, date, venue, and essential vendors. Once those are secure, handle attire, guest communication, ceremony requirements, catering, and logistics.
Then move to decorative details.
With three months or less, flexibility becomes especially useful. Venue choice, weekday availability, guest count, off-the-rack attire, simplified stationery, and a smaller vendor team can reduce the number of dependencies you are managing.
The principle remains the same:
Do the decisions that affect other decisions first.
For example, choosing napkin colors rarely determines your venue. Choosing your venue can determine your catering options, furniture, guest capacity, décor restrictions, closing time, and transportation plan.
Priority beats chronology when time is short.
Destination Wedding Checklist: Tasks That Need Extra Attention
A destination wedding adds a travel-planning layer to the normal checklist.
Alongside the regular tasks, investigate legal marriage requirements at the destination, passport validity, visas where applicable, travel insurance, flights, accommodation, airport transfers, vendor travel costs, currency or payment arrangements, luggage restrictions, weather, and transportation for guests.
Also decide whether the legal marriage and ceremonial celebration will happen in the same country. Some couples complete legal formalities at home and hold a symbolic or religious ceremony at the destination because local requirements may be complex.
Check all legal and entry requirements through official government sources.
Guests also need information earlier when international travel is involved, which makes an accurate wedding website and clear accommodation guidance more valuable.
Cultural and Multi-Day Wedding Checklist
A single timeline can become confusing when the wedding includes several major events.
Instead, create one master planning document with a separate section for each celebration.
For example, a multi-day South Asian wedding might involve events such as Mehndi, Sangeet, Haldi, Nikkah, Baraat, reception, or Walima depending on the couple’s traditions. Current specialist checklists for Pakistani and Indian weddings emphasize tracking venues, outfits, catering, décor, photography, invitations, transportation, and family responsibilities separately across the different functions.
For every event, record:
| Planning Area | Questions to Answer |
|---|---|
| Venue | Where is it and when is access available? |
| Guests | Who is invited to this specific event? |
| Attire | Which outfits and accessories belong to it? |
| Catering | What menu and guest count apply? |
| Photography | What coverage is required? |
| Décor | What needs delivery and setup? |
| Ceremony | Which traditions, documents, or participants are required? |
| Transport | Who needs to travel between locations? |
| Timeline | When do vendors and family members need to arrive? |
| Responsibility | Who is managing this event on the day? |
This prevents information from one function being accidentally applied to another.
Common Wedding Planning Mistakes a Checklist Should Prevent
The most useful wedding checklist does more than remind you to order invitations. It helps prevent bad sequencing.
Booking before establishing the budget
A deposit feels like one expense, but every booking commits part of the total budget.
Track the full contract value, not merely what you have already paid.
Finalizing the guest list too late
Guest numbers affect too many other decisions to remain vague indefinitely.
Establish an approximate count early and tighten it progressively.
Assuming vendor contracts are interchangeable
They are not.
Payment schedules, cancellation policies, delivery, overtime, replacement provisions, travel, setup, and ownership of deliverables can differ substantially.
Read every contract.
Planning a beautiful outdoor wedding without a backup plan
Weather cannot be negotiated with.
If the celebration depends on an outdoor space, understand exactly what happens if conditions change and when the decision to activate the alternative arrangement must be made.
Forgetting post-wedding responsibilities
The celebration ending does not mean the administrative work is finished.
Rentals may need returning, attire may need cleaning, photos may need selecting, gifts require acknowledgment, vendors may need final communication, and legal documents may need to be obtained or stored.
After the Wedding: The Checklist Is Not Quite Finished
Give yourselves time to enjoy the first days after the celebration, but keep a short post-wedding list.
Return rented attire, décor, equipment, or accessories by their deadlines. Confirm that all vendor payments are complete. Store contracts and receipts until everything has been delivered.
Arrange cleaning or preservation for wedding clothing if desired.
Back up personal photos and videos while waiting for professional galleries.
Send thank-you messages or notes according to your customs and circumstances.
If either partner plans a legal name change, research the official process for the relevant jurisdiction rather than assuming it happens automatically with marriage.
Obtain and safely store certified marriage documentation when needed for legal, financial, travel, immigration, insurance, or identification purposes.
The Best Way to Use This Wedding Checklist
Do not treat a planning timeline as a set of rigid rules.
A useful checklist should adapt to your date, location, culture, budget, guest count, priorities, and available vendors. WeddingWire and Zola both emphasize customizable checklists because tasks and due dates differ from one wedding to another.
Begin with the tasks that determine everything else: budget, guest count, date, venue, and critical vendors. Then move through attire, guest communication, ceremony planning, reception details, logistics, legal requirements, and final confirmations.
Most importantly, keep one master wedding checklist instead of maintaining several conflicting versions.
Cross off completed tasks, remove traditions that do not belong to your celebration, add cultural or personal requirements that do, and review the next few deadlines regularly.
The goal is not to execute the longest possible wedding to-do list. It is to create enough structure that when the wedding arrives, you can stop managing it and actually experience it.