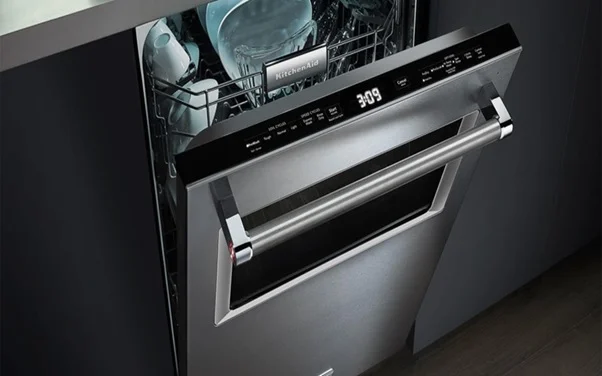
If your KitchenAid dishwasher is not draining, several common issues could be the culprit, and many can be resolved through simple troubleshooting steps. The drainage system consists of, multiple components such as the drain hose, pump, and filter, which can develop, problems over time. This article will guide, readers through understanding KitchenAid dishwasher drainage systems, identifying common causes of drainage issues, troubleshooting procedures, DIY fixes, professional repair options, preventive maintenance, and available KitchenAid support resources. By following this comprehensive guide, you’ll be equipped to diagnose and potentially resolve your dishwasher’s drainage problems, saving time and money on unnecessary service calls.
1. Understanding KitchenAid Dishwasher Drainage Systems
Best KitchenAid dishwashers incorporate, sophisticated drainage systems designed to efficiently remove water and food particles after each wash cycle. The drainage system comprises, several key components that work in tandem to ensure proper water evacuation. Understanding these components and their functions is crucial, for effective troubleshooting and maintenance.
Components of KitchenAid Dishwasher Drainage Systems:
- Drain Pump: Propels, water out of the dishwasher
- Drain Hose: Carries, wastewater from the dishwasher to the sink drain or garbage disposal
- Filter System: Traps, and food particles to prevent clogs
- Check Valve: Prevents, backflow of dirty water into the dishwasher
- Air Gap: Prevents, siphoning of contaminated water back into the dishwasher
KitchenAid offers various dishwasher models, each with slight variations in their drainage systems. However, the fundamental principles remain, consistent across the product line. A properly functioning drainage system ensures, complete water evacuation after each cycle, leaving your dishes clean and your dishwasher ready for the next use.
2. Common Causes of Drainage Issues
Drainage problems in KitchenAid dishwashers can stem from, various sources, ranging from simple clogs to more complex mechanical failures. Identifying the root cause is essential, for effective resolution of the issue.
Table: Common Drainage Issues and Their Causes
| Issue | Possible Causes | Severity |
| Clogged Drain Hose | Food debris accumulation, Kinked hose | Moderate |
| Faulty Drain Pump | Mechanical failure, Electrical issues | High |
| Blocked Filter | Food particle buildup, Inadequate cleaning | Low to Moderate |
| Air Gap Problems | Clogging, Improper installation | Moderate |
| Garbage Disposal Connection Issues | Knockout plug not removed, Clogged disposal | Moderate |
The drain hose can become, clogged due to food debris accumulation or improper installation. A kinked or damaged hose may restrict, water flow, leading to drainage problems. The drain pump, a critical component, can fail, due to mechanical issues or electrical faults, significantly impacting the dishwasher’s ability to evacuate water.
Filters play a crucial role in preventing large food particles from entering the drainage system. When filters become, excessively dirty or clogged, they can impede, proper drainage. Regular cleaning and maintenance of filters is essential, for optimal performance.
Air gap problems can arise from clogging or improper installation. The air gap prevents, contaminated water from siphoning back into the dishwasher, but if it becomes blocked, it can cause drainage issues. Similarly, issues with the garbage disposal connection, such as a knockout plug that hasn’t been removed or a clogged disposal, can lead to, drainage problems.
3. Troubleshooting and Diagnostic Procedures
Effective troubleshooting begins with, systematic diagnosis of the drainage issue. KitchenAid dishwashers are equipped with, error codes that can provide valuable insights into the nature of the problem.
Interpreting Error Codes:
- Error Code 1-1: Drain pump issue
- Error Code 1-2: Drain timeout
- Error Code 7-1: Heating circuit malfunction
To initiate the troubleshooting process:
- Check, the dishwasher filter for any debris or clogs
- Inspect, the drain hose for kinks or blockages
- Verify, proper connection to the garbage disposal or sink drain
- Run, a diagnostic cycle if available on your model
KitchenAid dishwashers often feature, built-in diagnostic cycles that can help identify specific issues. To access this feature, consult your model’s user manual for the correct button sequence to activate the diagnostic mode.
Table: Troubleshooting Steps and Their Effectiveness
| Step | Action | Effectiveness |
| Filter Inspection | Remove and clean the filter | High |
| Drain Hose Check | Straighten and clear any blockages | High |
| Garbage Disposal Check | Ensure knockout plug is removed and disposal is clear | Moderate |
| Air Gap Inspection | Clean the air gap if present | Moderate |
| Drain Pump Test | Check for proper operation and clear any debris | High |
By systematically working through these troubleshooting steps, you can often identify the source of the drainage problem. If the issue persists after completing these procedures, it may be time to consider professional assistance.
4. DIY Fixes for Minor Drainage Problems
Many drainage issues can be resolved, through simple DIY fixes, saving time and money on professional repairs. These solutions are typically effective, for minor problems and require basic tools and minimal technical knowledge.
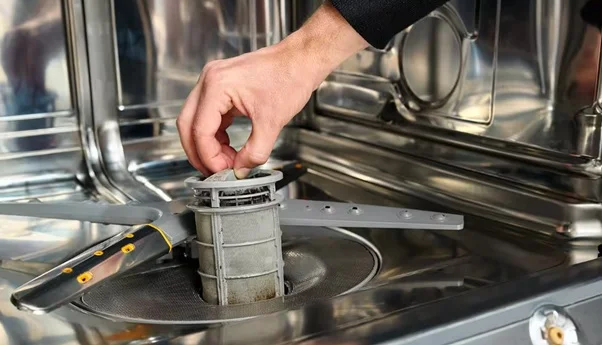
To clean the dishwasher filter:
- Remove, the lower dish rack to access the filter
- Twist and lift, the cylindrical filter out of its housing
- Rinse, the filter under running water to remove debris
- Wipe, the filter housing with a damp cloth
- Reinsert, the clean filter and ensure it’s properly seated
Unclogging the drain hose involves, disconnecting it from both the dishwasher and the sink drain or garbage disposal. Use, a plumber’s snake or high-pressure water to clear any blockages. Ensure the hose is free of, kinks when reinstalling it.
The air gap, typically located on the sink or countertop, can be cleaned by removing its cap and clearing any debris inside. This simple action can resolve, many drainage issues related to the air gap.
For garbage disposal-related problems:
- Ensure, the knockout plug has been removed from the disposal inlet
- Run, the garbage disposal to clear any potential clogs
- Check, the connection between the dishwasher drain hose and the disposal
These DIY fixes can often resolve, minor drainage issues without the need for professional intervention. However, if problems persist or you encounter any difficulties during these procedures, it’s advisable to seek expert assistance.

5. When to Call a Professional Repair Service
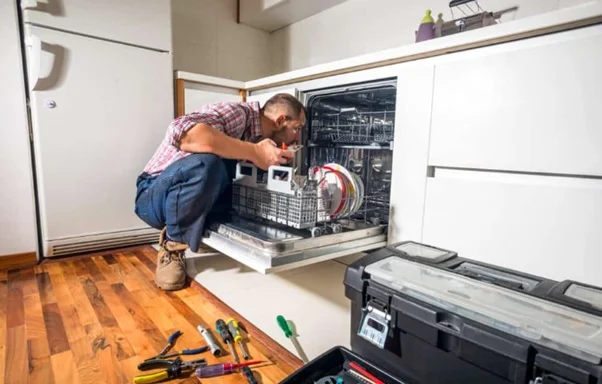
While many drainage issues can be resolved, through DIY methods, certain problems require, professional expertise. Recognizing when to call a repair service can save, time and prevent potential damage to your dishwasher.
Signs that indicate the need for professional repair include:
- Persistent drainage issues after attempting DIY fixes
- Unusual noises coming from the drain pump
- Multiple error codes or system failures
- Water leaking from the dishwasher base
- Electrical issues or burning smells
Professional repair services offer, specialized knowledge and access to genuine KitchenAid replacement parts. When selecting a repair service, consider the following factors:
- Certification and experience with KitchenAid appliances
- Positive customer reviews and ratings
- Warranty coverage for parts and labor
- Upfront pricing and detailed estimates
Cost Considerations for Professional Repairs:
| Repair Type | Estimated Cost Range |
| Drain Pump Replacement | $150 – $350 |
| Drain Hose Replacement | $100 – $200 |
| Control Board Repair | $200 – $500 |
| Full System Diagnosis | $75 – $150 |
These costs can vary, based on your location, the specific model of your KitchenAid dishwasher, and the complexity of the repair. Always obtain, multiple quotes from reputable repair services before proceeding with professional repairs.
6. Preventive Maintenance for Optimal Drainage
Preventive maintenance plays a crucial role in avoiding drainage issues and extending the lifespan of your KitchenAid dishwasher. Regular upkeep can prevent, many common problems and ensure optimal performance.
To maintain your dishwasher’s drainage system:
- Clean, the filter at least once a month
- Inspect, the drain hose for kinks or damage quarterly
- Run, an empty hot water cycle with vinegar every three months
- Check and clean, the spray arms to ensure proper water distribution
- Use, a dishwasher cleaner designed for removing mineral buildup annually
Proper loading techniques can significantly reduce, the risk of drainage issues. Avoid overloading the dishwasher and ensure that no items obstruct the spray arms or filter area. Scrape off large food particles before loading dishes to prevent filter clogs.
Choosing the right detergent and rinse aid is essential, for maintaining your dishwasher’s drainage system. Use high-quality detergents designed for modern dishwashers and avoid using too much, as excess suds can cause drainage problems.
By implementing these preventive measures, you can minimize the likelihood of encountering drainage issues and ensure that your KitchenAid dishwasher continues to operate efficiently for years to come.
In conclusion, addressing drainage issues in your KitchenAid dishwasher requires, a systematic approach that combines understanding the drainage system, identifying common problems, performing DIY fixes when appropriate, and knowing when to seek professional help. By following the guidelines outlined in this article and utilizing KitchenAid’s support resources, you can effectively troubleshoot and resolve most drainage problems, ensuring that your dishwasher continues to function optimally for years to come.
For more information click here.

