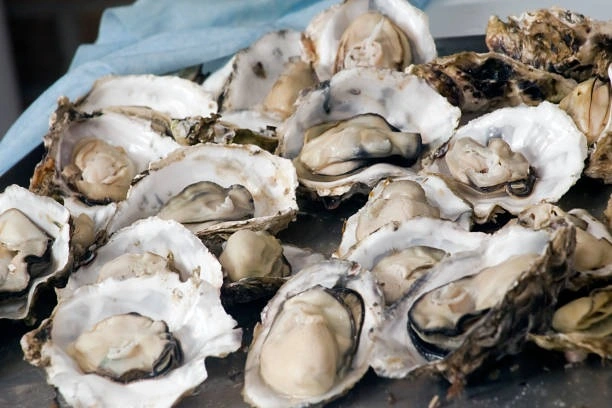
Oysters—those delightful little morsels of briny perfection—are a true taste of the ocean. But shucking them—prying them open from their tightly sealed shells—can be daunting for the uninitiated. Fear not, fellow seafood enthusiasts! With some practice and the following tips, you’ll be shucking oysters like a seasoned chef in no time, ready to impress your friends and family at your next gathering.
Why Shuck Your Own Oysters?
There’s a certain satisfaction that comes with shucking your oysters. It’s a bit of a ritual, a way to connect with the food you’re about to enjoy. Plus, freshly shucked oysters offer the ultimate in flavour and texture. Pre-shucked oysters can sit out for extended periods, affecting their quality. By shucking them yourself, you can guarantee the freshest possible taste.
If you’re looking for an excuse to hone your shucking skills, there’s no better place to do it than at a renowned oyster festival. Narooma’s Oyster Festival, held annually on the New South Wales south coast, celebrates all things oyster. Here, you can savour fresh oysters from around the country, participate in shucking competitions, and learn from the experts.
The Essential Tools
Before you embark on your oyster-shucking journey, you’ll need a few key tools:
- Oyster Knife: A good oyster knife is essential. Look for one with a short, sturdy blade that’s blunt at the tip. This design helps you pry the shell without damaging the delicate meat inside.
- Heavy-duty gloves: Oysters can have sharp edges, so protect your hands with thick gloves.
- Kitchen towel: A clean kitchen towel will provide a non-slip grip on the oyster while you shuck.
Selecting the Perfect Oysters
Not all oysters are created equal. When selecting oysters for shucking, look for the following:
- Live Oysters: The most important factor is to choose live oysters. Fresh oysters will have tightly closed shells. If you tap a live oyster and the shell doesn’t close, discard it.
- Shell Weight: Pick oysters that feel heavy for their size. This indicates a plump, meaty oyster inside.
- Fresh Smell: Fresh oysters should have a clean, briny smell. Avoid any oysters with a fishy odour.
Shucking Like a Pro: A Step-by-Step Guide
Now that you have your tools and oysters, it’s time to get shucking! Here’s a step-by-step guide:
- Prepare Your Workspace: Choose a clean, flat work surface. Lay down a damp kitchen towel to stabilise and prevent the oyster from slipping.
- Position the Oyster: Hold the oyster in your non-dominant hand, with the hinge facing you and the cupped side down on the towel.
- Insert the Knife: Using your dominant hand, insert the oyster knife tip into the hinge of the oyster shell. Be careful not to puncture the meat inside.
- Twist and Pry: Gently pry the hinge open slightly with a twisting motion. You may hear a popping sound as the muscle holding the shell closed releases.
- Sever the Muscle: Once the hinge is slightly open, slide the knife blade carefully between the flesh and the bottom shell. Run the knife along the entire inner edge of the shell to sever the muscle that holds the oyster in place.
- Open and Inspect: Carefully open the shell once the muscle is severed. Keep the oyster level to prevent the precious juices from spilling out.
- Remove the Meat: Use the knife to detach the oyster meat from the top shell gently.
- Clean and Enjoy: Check for any shell fragments and remove them. Now you’re ready to enjoy your freshly shucked oyster!
Tips and Tricks for Flawless Shucking
Here are some additional tips to help you become a shucking pro:
- Start Small: If you’re a beginner, start with smaller oysters. They’re generally easier to open.
- Practice Makes Perfect: The more you shuck, the better you’ll become. Don’t get discouraged if it takes a few tries to get the hang of it.
- Work Quickly: Shuck the oysters as quickly as possible to preserve their freshness and flavour.
- Safety First: Always be mindful of the sharp knife and wear gloves to avoid cuts.
Beyond the Basics: Shucking Techniques and Presentation
Once you’ve mastered the basic shucking technique, you can explore different methods for different types of oysters. Here are a few variations to consider:
- Flat Oysters: Flat oysters, like Pacific oysters, have a less pronounced hinge. You might need to insert the knife tip at the bill (the pointed end) and twist it to open the shell.
- Deep Oysters: Like Kumamoto oysters, deep oysters have a cupped lower shell. Insert the knife deeper into the hinge and pry upwards to open.
Presentation is Key
Now that you have your perfectly shucked oysters, it’s time to plate them! Here are some ideas for a stunning presentation:
- Classic on Ice: A simple yet elegant way to serve oysters is on a bed of crushed ice. This keeps them chilled and allows the natural brininess to shine through. Add lemon wedges, mignonette sauce (a classic shallot and vinegar sauce), and cocktail sauce for dipping.
- Oyster Shooters: Feeling adventurous? Try serving oysters in small shot glasses with a touch of mignonette sauce and a squeeze of fresh lemon. It’s a fun and refreshing way to enjoy them.
- Oyster Rockefeller: This baked oyster dish is a decadent treat. Top freshly shucked oysters with creamy spinach Pernod sauce and breadcrumbs, and bake until golden brown.
Conclusion
Shucking oysters may seem intimidating at first, but with a bit of practice and the right techniques, you’ll be a pro in no time. So, grab your oyster knife, gather some fresh oysters, and get shucking! The reward is a delicious taste of the ocean and the satisfaction of mastering a new culinary skill. And who knows, maybe you’ll even hone your skills enough to compete at the Narooma Oyster Festival someday!
For more information on related articles and information, click here.


