When it comes to photography, light is more than simply an essential component; it is a potent narrative device. Lens flare is one of the several techniques that may be used to give a cinematic touch, warmth, and emotion to your footage. Photeeq Lens Flare provides photographers with an expert-level option for artistically and organically incorporating these effects. How to get the most of this multi-purpose instrument is the subject of this guide.
Understanding Lens Flare
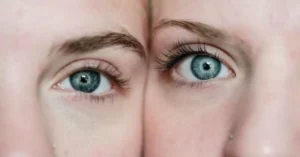
A lens flare happens when very bright light rays strike the lens directly and then disperse, creating streaks, halos, or a gentle haze. While intentionally using it may create atmosphere, increase realism, and add creative flare, it is typically seen as a defect. This effect is commonly used by photographers to create the illusion of sunshine, depth, or a nostalgic or dreamy mood.
What is Photeeq Lens Flare?
Photeeq Lens Flare is a digital plugin designed for photo editing software, specifically aimed at replicating realistic lens flare effects. It doesn’t rely on simple overlays but simulates light behavior, making the flares blend naturally into your image. It’s particularly popular among photographers and designers looking to add professional polish to their visuals.
Features of Photeeq Lens Flare
- Customizable Effects: Adjust brightness, color, angle, and more.
- Realistic Simulation: Mimics optical light dispersion.
- User-Friendly Interface: Ideal for all experience levels.
- Non-Destructive Editing: Original images remain untouched.
- Broad Compatibility: Works seamlessly with leading editing platforms.
How to Use Photeeq Lens Flare
- Installation: Add the plugin to your editing software.
- Select an Image: Open the image you want to enhance.
- Choose a Flare: Browse preset flares or create your own.
- Customize the Effect: Fine-tune brightness, hue, direction.
- Preview and Save: Apply the effect and export your finished image.
Creative Applications
Photeeq Lens Flare can enhance various photography styles:
- Portraits: Add backlighting for a dreamy glow.
- Nature: Emphasize sunbursts in landscapes.
- Urban: Highlight artificial lights in cityscapes.
- Commercial: Give product photos a vibrant, modern look.
Tips for Effective Use
- Align with Light Source: Make sure flares match the image’s lighting.
- Don’t Overdo It: Subtlety keeps your photo looking professional.
- Use in Highlights: Enhance areas already catching light.
- Color Matching: Coordinate flare tones with your image palette.
Conclusion
If you want your images to look like they were shot in a movie, Photeeq Lens Flare is an easy and flexible method to do it. This application is perfect for both amateurs and professionals since it allows you to add controlled and realistic flares to your visual narrative. By applying it with care, your photographs may take on a whole new dimension.
Give Photeeq Lens Flare a go right now to make your artistic dreams a reality.
FAQs
Q1: Is Photeeq Lens Flare free?
A1: It offers a free trial version. The full version includes advanced features.
Q2: Can I use it on mobile devices?
A2: Currently, it is optimized for desktop software like Photoshop.
Q3: Is it suitable for client or commercial work?
A3: Yes, it’s commonly used in professional and commercial projects.
Q4: Will it slow down my workflow?
A4: It is designed for efficient use and minimal lag.
Q5: Does it support RAW images?
A5: Yes, it works with RAW as well as other file types.
For more information, click here.