Drawing is a rewarding skill that allows you to express your creativity, and one of the most popular objects to sketch is a bicycle. Whether you’re an aspiring artist or someone who just enjoys doodling, learning to create a detailed bike drawing can be both fun and challenging. In this comprehensive guide, we will explore various techniques and methods to draw a bike, including how to make your bike drawing easy, how to add color, create a 3D effect, and improve your pencil sketching skills.
The Basics of Bike Drawing
Before delving into more advanced techniques, it’s essential to understand the basic structure of a bike. A bicycle consists of several parts, including wheels, frame, pedals, handlebars, and a seat. To create a successful bike drawing, it’s important to familiarize yourself with these parts and how they fit together.
- Frame: The frame is the main body of the bike, typically composed of a triangle for the top tube, seat tube, and down tube. Understanding how these components connect can help in sketching the framework accurately.
- Wheels: The two circular wheels are equally important. Ensuring that they are proportionate to the frame is key to creating a realistic bike.
- Handlebars and Seat: The handlebars and seat sit on the front and rear sections of the bike, respectively. Proper placement of these parts brings the bike together visually.
Bike Drawing Easy: Step-by-Step Process
To make a bike drawing easy, start by breaking the object into simple shapes. This method helps in ensuring proportions are correct before adding finer details. Here’s a step-by-step guide:
- Step 1: Drawing the Wheels
Begin by drawing two identical circles on your paper. Use a compass or trace a round object to get perfect circles. These represent the front and rear wheels. - Step 2: Sketching the Frame
Connect the two circles with a set of lines to create the frame. Draw a straight line between the center of the two circles, which will serve as the bottom tube. Then, sketch the top tube connecting the upper parts of the wheels. - Step 3: Adding the Pedals and Chainring
In the middle of the frame, draw a small circle for the chainring. Add two small rectangles for the pedals extending from either side of the chainring. - Step 4: Drawing the Handlebars and Seat
At the front of the bike, draw the handlebars extending from the top of the frame near the front wheel. At the rear, sketch the seat above the back wheel. - Step 5: Final Details
Refine your drawing by adding more details, such as spokes on the wheels, brake cables, and a chain.
By breaking down the process into easy-to-follow steps, you can create a bike drawing with correct proportions. This approach is particularly useful for beginners who want to improve their confidence in sketching.
Enhancing Your Bike Drawing with Colour
Once you’ve mastered the basics of sketching a bike, the next step is to enhance it with colors. Using color can bring your drawing to life, making it more vibrant and appealing.
- Choose a Color Palette
The first step is selecting a color palette for your bike. You can go for a realistic approach, using colors typically found on bicycles, like black, red, blue, or silver, or you can choose more creative colors to give your bike a unique look. - Shading and Highlighting
Use different shades of the same color to give your bike more depth. For example, use a darker shade of blue for the frame’s shadows and a lighter shade for the highlights where the light hits. This method creates a 3D effect, making your bike look more realistic. - Coloring the Wheels
Pay special attention to the wheels. While the tires are usually black, you can use a subtle gradient to indicate light and shadow, adding a sense of realism to your bike drawing with color.
Adding color to your bike drawing can transform a simple sketch into a more dynamic and eye-catching illustration. It’s also a great way to experiment with different techniques, such as blending and layering colors to create depth and texture.
Bike Drawing 3D: Creating Realistic Effects
If you want to take your bike drawing to the next level, creating a 3D effect is a great way to add more realism. 3D bike drawings require a good understanding of perspective, shading, and proportions.
- Understanding Perspective
Perspective is key when creating a 3D bike drawing. Start by imagining the bike as a collection of shapes that exist in three-dimensional space. For example, the wheels are not flat circles but rather round shapes with depth. You can achieve this by drawing ellipses instead of perfect circles, which will give the impression that the wheels are viewed at an angle. - Shading for a 3D Look
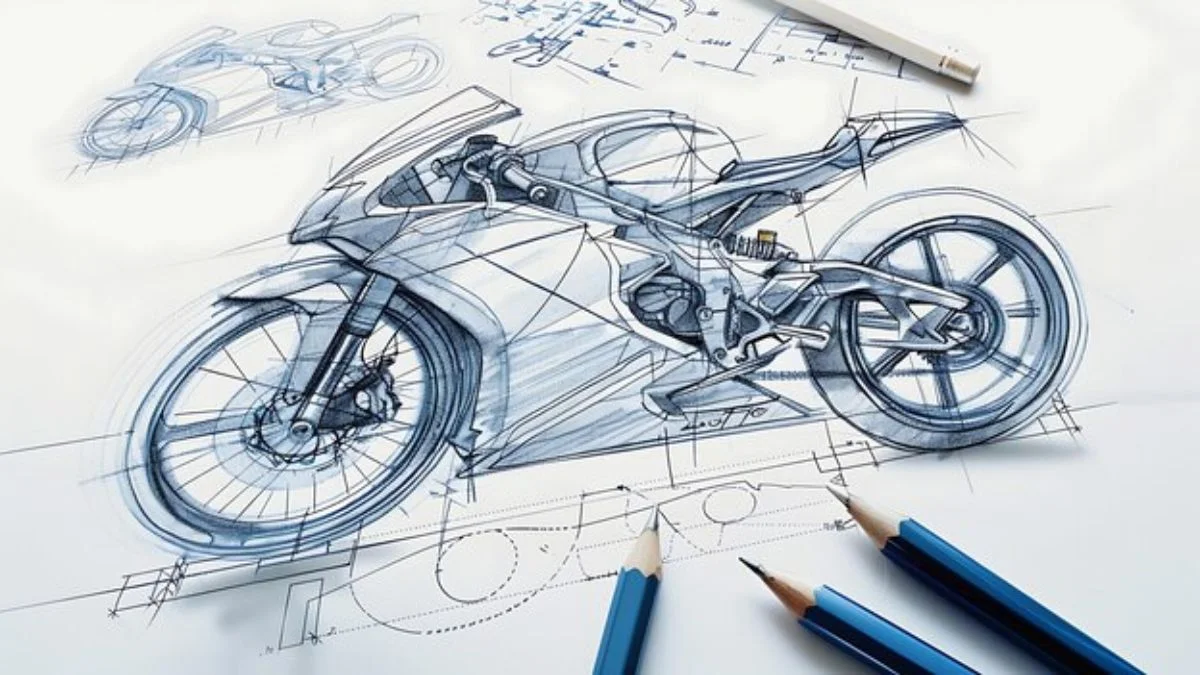
Proper shading is crucial to creating a 3D effect. Use a soft pencil or a blending tool to create gradual transitions between light and dark areas. The frame of the bike will have darker areas where it curves away from the light source, and the tires will have shadows on the bottom where they meet the ground. - Adding Reflections
To make your bike drawing look even more realistic, add reflections and highlights. For example, you can use a white pencil or eraser to create highlights on the metal parts of the bike, like the frame, handlebars, and pedals. This small detail can make a huge difference in giving your drawing a polished, professional look.
By combining perspective, shading, and reflections, you can create a bike drawing that looks like it’s jumping off the page. Mastering the 3D effect takes practice, but it’s a valuable skill for any artist.

Mastering Bike Drawing Pencil Techniques
Pencil drawing is one of the most versatile and accessible forms of art. With a simple pencil, you can create incredibly detailed and intricate bike sketches. Here are some tips for mastering bike drawing with pencil:
- Use a Range of Pencils
Different pencils produce different effects. For example, a 2H pencil is great for light outlines, while a 6B pencil creates dark, rich shadows. By using a variety of pencils, you can add depth and texture to your bike drawing. - Focus on Details
Pencil drawings allow for fine details, such as the spokes of the wheels, the texture of the tires, or the grooves in the pedals. Take your time to carefully render these elements, as they can make your drawing look more realistic. - Blending for Smooth Shading
To create smooth transitions between light and shadow, use a blending tool like a tortillon or even your finger. This technique is especially useful for shading areas like the tires, frame, and chainring, where you want a soft, even gradient. - Creating Texture
One of the advantages of pencil drawing is the ability to create texture. Use cross-hatching or stippling techniques to add texture to different parts of the bike, such as the rubber of the tires or the metal of the frame.
Pencil drawing offers a lot of control, making it ideal for detailed sketches of bicycles. With practice, you can master the art of shading and texturing to create stunning bike drawings.
Exploring Different Bike Drawing Styles
In addition to the traditional bike drawing techniques, there are many different styles you can explore to make your work stand out. Some of these styles include:
- Cartoon Bike Drawing
For a more playful and exaggerated look, try drawing a cartoon version of a bike. In this style, you can use bold lines, bright colors, and exaggerated proportions to create a fun and whimsical drawing. - Realistic Bike Drawing
On the other end of the spectrum is a hyper-realistic bike drawing. In this style, you aim to create a drawing that looks as close to a real photograph as possible. This requires careful attention to detail, accurate proportions, and realistic shading. - Abstract Bike Drawing
If you want to get more creative, consider trying an abstract style. This allows you to break the bike down into basic shapes and forms, playing with color and composition to create a more artistic and less literal representation of a bicycle. - Minimalist Bike Drawing
Minimalist drawing is all about simplicity. In this style, you use as few lines as possible to capture the essence of the bike. This is a great exercise in reducing complex objects to their most essential elements, and it can produce very elegant results.
Exploring different drawing styles can help you find your artistic voice and make your bike drawings more unique.
Tips for Improving Your Bike Drawing Skills
Drawing a bike can be tricky, especially when it comes to getting the proportions right and making it look realistic. Here are some tips to help you improve your bike drawing skills:
- Practice Regularly
Like any skill, drawing requires practice. The more you draw, the better you will get. Try to sketch bikes from different angles and in different styles to challenge yourself and improve your versatility. - Use References
Drawing from real-life references or photographs can help you understand the structure of a bike and how its parts fit together. Look at images of different types of bikes to see how they vary in design. - Start with Simple Shapes
Don’t try to draw the bike all at once. Start with simple shapes, such as circles and lines, to block out the basic structure. Once you have the basic shapes in place, you can add details and refine your drawing. - Experiment with Tools
Try using different tools, such as colored pencils, markers, or digital drawing software, to see what works best for you. Each medium offers different possibilities and challenges, so experimenting can help you discover new techniques. - Study Other Artists
Look at bike drawings by other artists to get inspiration and learn new techniques. You can find many tutorials and examples online, which can give you ideas for your own work.
Conclusion
Drawing a bike may seem daunting at first, but with the right approach, it can be an enjoyable and rewarding experience. By breaking the process down into simple steps, experimenting with color, learning how to create a 3D effect, and mastering pencil techniques, you can improve your bike drawing skills and create impressive artworks. Whether you’re a beginner or an experienced artist, there’s always room to grow and develop your skills in bike drawing. Keep practicing, experimenting, and most importantly, have fun with your art.
FAQs
How can I make my bike drawing easy?
To make your bike drawing easy, start by breaking the bike down into basic shapes like circles and lines. This simplifies the structure and helps you focus on proportions before adding details.
How do I add color to my bike drawing?
To add color, choose a color palette and use different shades to create depth. Shading and highlighting can help give your bike drawing a more realistic look.
What techniques can I use for a 3D bike drawing?
To create a 3D effect, focus on using perspective, shading, and highlights. Drawing the wheels as ellipses and adding shadows can give the bike a sense of depth and realism.
Which pencils are best for a bike drawing?
Use a range of pencils from 2H to 6B. Lighter pencils like 2H are great for sketching, while darker pencils like 6B are ideal for shading and adding depth.
Can I draw a bike in different styles?
Yes, you can experiment with different styles, such as cartoon, realistic, abstract, or minimalist. Each style offers a unique approach to representing a bike.
How do I improve my bike drawing skills?
Practice regularly, use references, start with simple shapes, experiment with different tools, and study other artists to improve your bike drawing skills.


